Does a distracting background make you feel stuck on your photo editing journey? This can frustrate you and deprive your subjects of the merit they deserve.
With its useful tools for background removal, Procreate may be the answer to your problem. Keep reading to find out how to remove background in Procreate in 2 easy ways:
Why use Procreate to remove background
Trusted by creative professionals worldwide, Procreate can help you create unique and compelling visuals. Its powerful Selection Tool can offer an efficient solution to background removal.
How to Remove Background in Procreate: Automatic & Manual Options
Procreate allows you to choose between 2 main methods to remove background. Let’s dive into each of them.
Automatic option
You are likely to use it for simple, solid backgrounds. Here is a 5-step guide on how you can use it:
Step 1. Import your image
Go to the ‘Actions’ menu under the wrench icon. After selecting ‘Add’, tap ‘Insert a Photo’ and choose the photograph from your device.
Step 2. Choose the Automatic Selection Tool
Click on the curved ‘S’ at the top of your canvas. This will automatically open the Selection Tool interface at the bottom of the screen. Click on the ‘Automatic’ option.
Step 3. Remove the background
Sometimes, the Automatic Selection Tool will select the background independently. If it doesn’t, just slide your finger or pencil across the selected area to adjust the threshold.
After you’ve selected the area, Tap on ‘Invert’ under the Selection Tool interface. This will invert the colours in your picture, telling you that you can now isolate the object.
Step 4. Isolate your subject
Now tap on ‘Copy/paste’. This will create a new layer with a removed background, allowing you to save the isolated picture
Step 5. Save and export your image
What’s left now is simply to export your image by clicking on ‘Share’ in the Actions menu.
You can now save your image in the most popular, widely used formats, such as JPEG, PNG, and PDF.
Easy? Now let’s look at the more challenging option.
Manual option
Sometimes, the Automatic tool may not work its magic. Read below about the cases when the manual option is preferable:
-
If the Automatic Selection Tool has not identified correctly the area you want to remove.
-
If you have a complex background with various objects and colours.
Here is a quick guide on how to use this option:
Step 1. Choose the Freehand Selection Tool
After you’ve imported the photo, click on ‘S’ at the top of the screen. You already know it’s your closest ally, the Selection Tool. Choose ‘Freehand” this time. After you’ve imported the photo, select the ‘Freehand’ selection tool at the bottom of the canvas
Step 2. Remove the background
-
Sketch a rough outline around your subject. Don’t worry, it doesn’t have to be perfect!
-
Click the ‘Invert’ button.
-
Swipe down the screen with three fingers until you see the ‘Copy, cut and paste’ menu.
-
Click on ‘Cut’.
Step 3. Manually erase the rest of the background
After you have removed the major part of the background, you can work on the remaining details. You now have two options:
- Choose ‘Eraser tool’ to manually erase the rest of the background around your subject.
- Continue using the ‘Selection tool’ to outline the area that has to be removed.
After you’ve done this, you can safely export your picture in the desired format.
Benefits of using Procreate to remove background
Here are the major reasons why Procreate may be your best option.
1.Work through details
With the Selection and Eraser tools at your disposal, Procreate allows you to fine-tune the area you want to remove. You can work through the most hard-to-reach places until you attain perfection! *
2.Polish the edges
After removing the background, Procreate allows you to clean the edges without harming the visual texture. Soften, smooth and refine the edges till you get it right!
3.Have control over the selection area
Whether you are working on a photograph with a simple or complex background, Procreate lets you be the boss at every stage of the process. This is especially helpful when you deal with noisy, chaotic and cluttered backgrounds.
Challenges of Removing Background in Procreate
Now you know you can remove background in Procreate with a very high degree of accuracy. And yet, Procreate is not a photo editing app, so there are a few tricky points you should be aware of.
1.Lengthy manual removal
While automatic background removal may be quick, manual options may be time-consuming. If you have that perfectionist streak in you, removing a background in Procreate may take you a while. You have to set a realistic timeframe for your project and be ready for a lengthy process.
2.Limited ability for automatic removal
The automatic Selection Tool may struggle with selecting the background. It works best with solid, simple colour backgrounds. In other cases, you may have to work through the selection area manually.
3.Using two tools for the same purpose
As you already know, you can use both the Freehand Selection Tool and the Eraser Tool to isolate your subject. If you are uncomfortable using them, the right choice of the tool may not be straightforward to you. This may impact your progress and sense of achievement.
A quick, easy, and efficient alternative to removing background in Procreate: Imagewith.AI’s Outcut.
Let’s be honest. Whether you are a creative enthusiast, a professional photographer, or a fashion fan, you know that a unique visual takes time to create. Your visual has to inspire and engage your audience. This is where you channel your time, thoughts, and creative energy. While you do what you do best, let Imagewith.AI solve the rest!
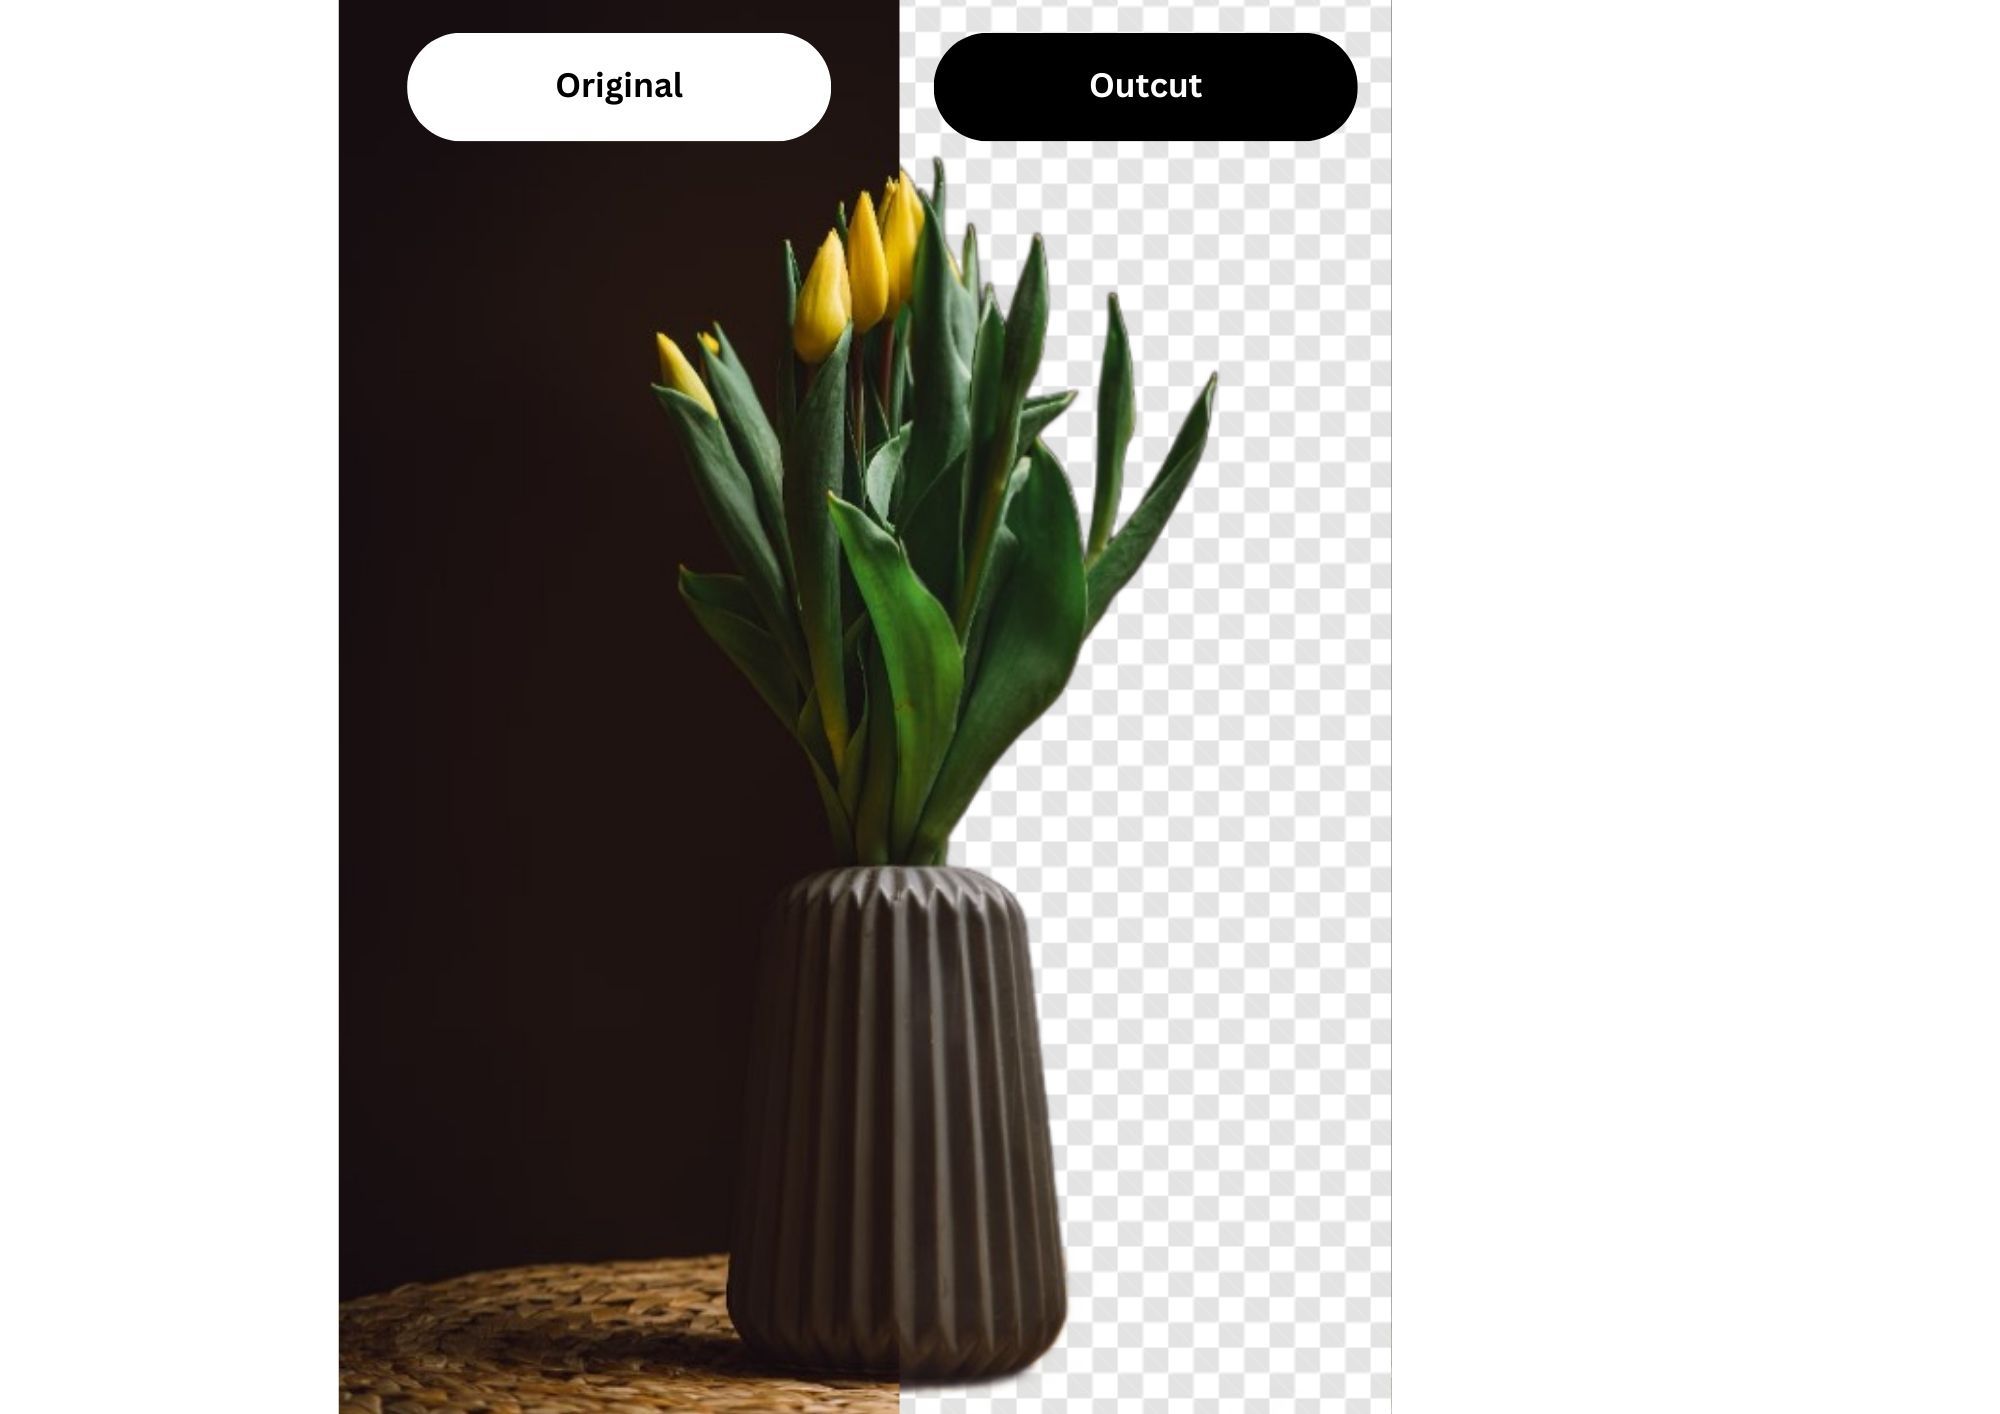
Created to support busy creative professionals like you, Outcut by Imagewith.AI performs high-quality background removal with lightning speed. Powered by fast and intelligent AI algorithms, Outcut revolutionizes your creative process. Here is how:
1.Speed and efficiency: a perfect match.
Fast and professional, Outcut gives you the best of both worlds. Unlike background removal in Procreate, you can forget about lengthy and painstaking tinkering. Powered by a quick and efficient machine learning algorithm, Imagewith.AI lets you get a highly accurate result in a matter of seconds.
2.Easy to use, even for beginners
No matter how much experience you have in photo editing, Outcut is there for you. All you need to do is upload a picture from your device. Imagewith.AI algorithm will then analyze the background area with a high degree of accuracy and produce the result in no time.
3.A quick analysis of even complex pictures
The Outcut does not work only with solid, straightforward backgrounds. Driven by powerful AI technology, it produces seamless results even with complex pictures. Whether it is a noisy, busy, or detail-filled background, the Outcut may save you time even on the most challenging project!
4. No software installation
To benefit from the Outcut feature, you do not have to install any software on your computer, Click ‘Upload a Picture’ and enjoy the result, in a matter of seconds.
5.Free to use
You can use the Outcut for free for up to 5 images every day! There are no hefty fees for your creative drive.
Smooth your workflow with ImageWith.AI Outcut
Here is how Imagewith.AI’s Outcut feature can support you on your creative journey:
1.Save time on what really matters
As a creative professional, you have many urgent goals. Choose the best lightning, pick the right angle, prepare your model, or take a photography course - the list goes on. Let the Outcut smooth your workflow and free up your time for new ideas.
2.Feel empowered with manual removal features
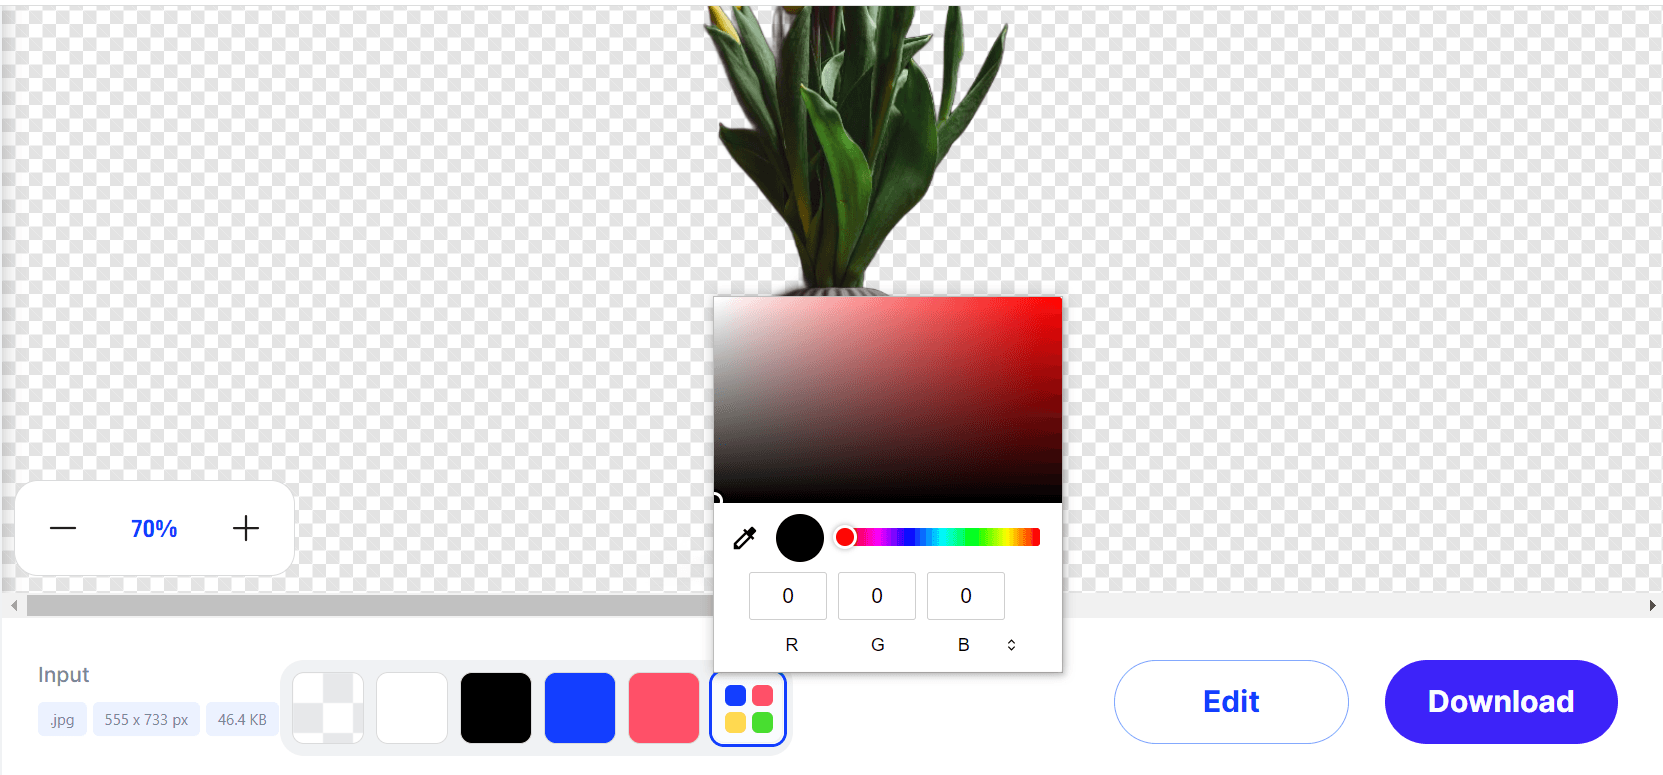
Apart from the Automatic option, Imagewith.AI gives you the possibility to smooth and soften the edges. Equipped with an infinite color palette, it allows you to choose the right shade for your subject’s background.
And what if you want to make some tweaks to the removed area? The Outcut helps you with that, too. With a wide variety of brush sizes, you are free to bring your subject to perfection.
3.Unleash your creative potential.
Unlike Procreate, the Outcut allows you to create a composite image immediately. Test various backgrounds, get a new vision for your project, and fuel your imagination with various alternatives. Uncover boundless possibilities of telling your story - only to pick the right one.
Looking for more inspiration? Discover more benefits of Outcut on our blog.
Conclusion
Now that you know how to remove background in Procreate, you can experiment with its two main options: Automatic and Freehand Selection Tool. If you can’t wait to learn how to do it in Procreate, you can start learning right now with the detailed guides in this post.
But if you want to channel your creative energy into what you do best, you can explore the Outcut by Imagewith. AI. Trusted by other restless creatives like you, the Outcut can help you spark your imagination, smooth your workflow, and empower you as a creative professional. It outclasses its competitors by bringing together an unparalleled combination of speed and quality. It gives you a seamless result in an instant, unleashing the power of the perfect match.


